由于android的产品碎片化很厉害,所以测试起APP来很麻烦。作者最近有需求需要重复测试一个场景,就总结了一些常见的Android测试方法。
CONTENTS
使用Monkey
Android系统附带的adb命令,可以很方便的进行各种压力测试。使用方式如下图,注意命令的路径即可。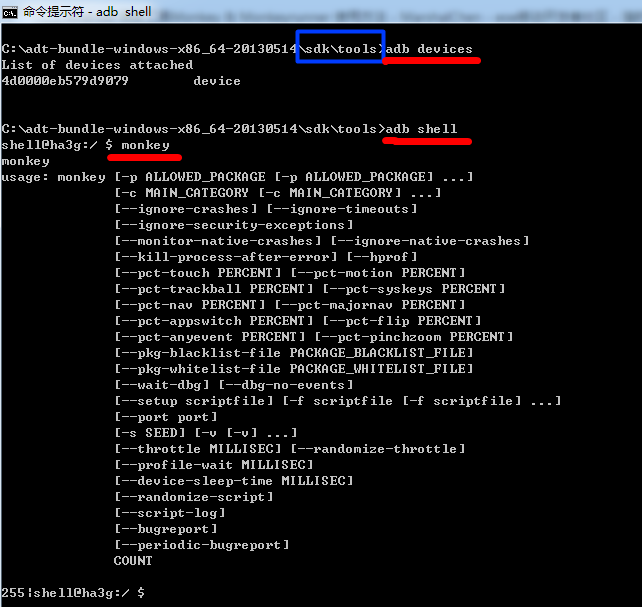
关于Monkey的命令的详细的介绍,网上有很多,大家可以参考。最简单的命令:随机发送100个命令:
monkey -v 100
备注:
参考:【 http://www.eoeandroid.com/blog-115192-2540.html 】【 http://developer.android.com/tools/help/monkey.html 】【 http://www.cr173.com/html/20410_1.html 】
使用Monkeyrunner:
Android的Monkey工具是随机发送屏幕指令,如果想要可控制的,可以使用Android的另外一个工具:Monkeyrunner。网上有很多关于Monkeyrunner的介绍,作者这里就简单的备份下自己的学习笔记:
Monkeyrunner的语法:
Monkeyrunner使用【 jython 】脚本语言,这个语言的参考资料:
【 http://www.ibm.com/developerworks/cn/education/java/j-jython1/ 】【 http://www.ibm.com/developerworks/cn/education/java/j-jython2/ 】【 http://www.fm0898.com/show.aspx?id=28890&cid=89 】【 http://www.jython.org/jythonbook/en/1.0/JythonIDE.html 】
Monkeyrunner的使用方法:
首先进入xxx/sdk/tools目录,如果Path中已经配置,那么可以略过。
然后新建脚本文件,在命令行里运行monkeyrunner test.py。为了简单,我将脚本文件放在了相同目录下。如下图: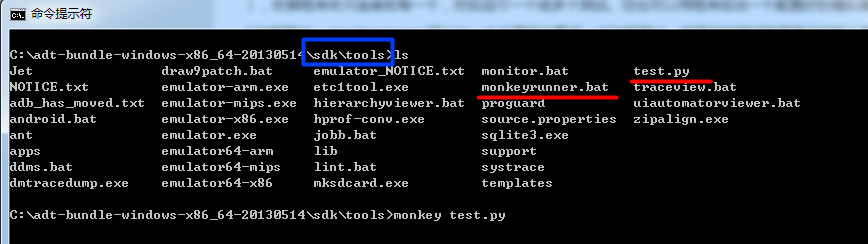
Monkeyrunner在Android里提供的用法:
Android提供了3个Monkeyrunner的工具包:【 MonkeyDevice 】【 MonkeyImage 】【 MonkeyRunner 】。三个方法里面的函数不多,这里简单备份下使用方法:
Test.py文件全貌:
#!/usr/bin/env python
# -*- encoding: utf-8 -*-
from com.android.monkeyrunner import MonkeyRunner, MonkeyDevice, MonkeyImage;
import sys;
MonkeyRunner.alert("this is a alert message", "alert title", "OK Button title");


mychoice = MonkeyRunner.choice("this is a choice message", ["Option A","Option B", "Option C"], "this is title");
if mychoice == 0:
	MonkeyRunner.alert("You select Option A", "alert title", "OK Button title");
elif mychoice == 1:
	MonkeyRunner.alert("You select Option B", "alert title", "OK Button title");
elif mychoice == 2:
	MonkeyRunner.alert("You select Option C", "alert title", "OK Button title");
else:
	MonkeyRunner.alert("You select Nothing", "alert title", "OK Button title");


result = MonkeyRunner.input("Please input sth", "this is init str", "the input dialog title", "OK Button title", "Cancel Button title");
MonkeyRunner.alert("Your input msg" + result, "alert title", "OK Button title");

MonkeyRunner.sleep(3);

device = MonkeyRunner.waitForConnection();


imageA = device.takeSnapshot();
imageA.writeToFile("./shot1.png",'png');

imageB = device.takeSnapshot();
isEqual90 = imageB.sameAs(imageA, 0.9);
print "isEqual90: %d" % (isEqual90);

subimage = imageB.getSubImage((10,20,100,150));
subimage.writeToFile("./subimage.png",'png');


device.installPackage("./xxxx.apk");

device.startActivity(None,None,None,None,None,None,"com.x.xxx/.xxx.XXXActivity",0);


print "width:%d" % (device.getProperty("display.width"));

device.press("KEYCODE_MENU",MonkeyDevice.DOWN_AND_UP);
device.press("KEYCODE_VOLUME_DOWN",MonkeyDevice.DOWN_AND_UP);
device.touch(300,300,MonkeyDevice.DOWN_AND_UP);


imageC = device.takeSnapshot();
imageC.writeToFile("./shot2.png",'png');
device.drag((300,300),(480,400), 5, 15);
imageD = device.takeSnapshot();
imageD.writeToFile("./shot4.png",'png');

device.removePackage("com.x.xxx");

sys.exit();
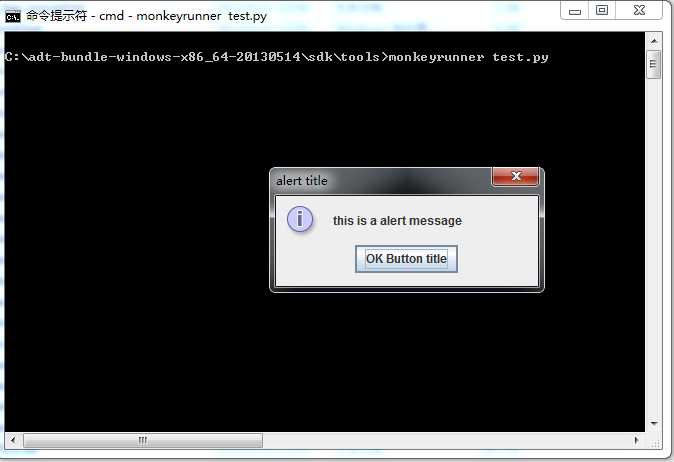
上述代码测试了monkeyrunner常见的几个函数,这里分别截图介绍一下:
MonkeyRunner.alert(“this is a alert message”, “alert title”, “OK Button title”);
mychoice = MonkeyRunner.choice(“this is a choice message”, [“Option A”,”Option B”, “Option C”], “this is title”);
if mychoice == 0:
MonkeyRunner.alert(“You select Option A”, “alert title”, “OK Button title”);
elif mychoice == 1:
MonkeyRunner.alert(“You select Option B”, “alert title”, “OK Button title”);
elif mychoice == 2:
MonkeyRunner.alert(“You select Option C”, “alert title”, “OK Button title”);
else:
MonkeyRunner.alert(“You select Nothing”, “alert title”, “OK Button title”);


result = MonkeyRunner.input(“Please input sth”, “this is init str”, “the input dialog title”, “OK Button title”, “Cancel Button title”);
MonkeyRunner.alert(“Your input msg” + result, “alert title”, “OK Button title”);

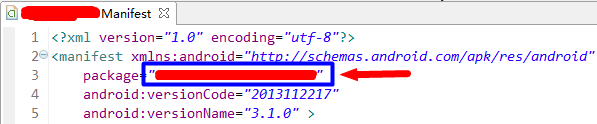
device.installPackage(“./xxxx.apk”);
device.removePackage(“com.x.xxx”);
这两个用来安装apk包。具体的包路径的写法如下图里面的package:
device.startActivity(None,None,None,None,None,None,”com.x.xxx/.xxx.XXXActivity”,0);
用来启动一个Activity,具体的参数可以参考Andrioid的官方API。
备注:
1) 作者对于jython也不是很熟悉,基本上靠google来完成编码语法。
2) 一些API没有介绍,大家可以参考Android的官方API。
3) 参考【 http://developer.android.com/tools/help/monkeyrunner_concepts.html 】【 http://youxilua.blog.51cto.com/3357586/772652 】【 http://xiaomaozi.blog.51cto.com/925779/925659 】
使用Android JUnit进行测试
网上的几篇文章写得很不错,这里就直接贴网址了。
参考:
【 http://tech.it168.com/a2010/1027/1118/000001118903_all.shtml 】
【 http://www.cnblogs.com/plokmju/p/android_junit.html 】
【 http://my.oschina.net/liux/blog/52469 】
使用Robotium进行测试
robotium是基于Android JUnit的二次封装之后的开源库,比较好用。网上的资料也很丰富,这里简单备份下网址,自己的就不写了。
参考:
【 https://code.google.com/p/robotium/ 】
【 http://xiaomaozi.blog.51cto.com/925779/908886 】
【 http://www.yiceyun.com/download/RobotiumDocument.pdf 】
备注:
1) 使用robotium可以很方便的进行程序流程性的测试,节省大量的测试成本,而且不需要算坐标,可以直接查找当前页面上的view,进行点选操作。
2) 后续应该整理一份Robotium的常用函数说明。
发表评论