我们做C语言开发时,对内存的申请和释放是非常头疼的,需要很小心的处理内存。valgrind可以在程序动态执行的时候进行内存检测,找出有问题的代码。这里备注下valgrind的使用:
CONTENTS
valgrind的官网地址:
valgrind的下载和安装:
进入下载页面后,可以发现页面上有两个连接可用下载,一个是valgrind的源码,另一个是valgrind的GUI程序。如下图所示:

关于valgrind的GUI介绍,大家可以参考这个网址:
【 http://valgrind.org/downloads/guis.html 】
里面也介绍了eclipse的插件使用方式。
valgrind的编译:
将两个链接的压缩包下载并解压后,进入valgrind3.9的目录,可以发现里面有个README,里面很详细的介绍了如何编译安装valgrind,我截取了部分README的内容如下:
Building and installing it
~~~~~~~~~~~~~~~~~~~~~~~~~~
To install from the Subversion repository :
  0. Check out the code from SVN, following the instructions at
     http://www.valgrind.org/downloads/repository.html.
  1. cd into the source directory.
  2. Run ./autogen.sh to setup the environment (you need the standard
     autoconf tools to do so).
  3. Continue with the following instructions...
To install from a tar.bz2 distribution:
  4. Run ./configure, with some options if you wish.  The only interesting
     one is the usual --prefix=/where/you/want/it/installed.
  5. Run "make".
  6. Run "make install", possibly as root if the destination permissions
     require that.
  7. See if it works.  Try "valgrind ls -l".  Either this works, or it
     bombs out with some complaint.  In that case, please let us know
     (see www.valgrind.org).
Important!  Do not move the valgrind installation into a place
different from that specified by --prefix at build time.  This will
cause things to break in subtle ways, mostly when Valgrind handles
fork/exec calls.
我们就按照这个指引来安装,输入命令,make时间较长:
./autogen.sh
./ configure
make
sudo make install
然后使用命令
valgrind ls -l
来检测是否安装成功,成功的话应该有类似下图输出:

GUI工具valkyrie的编译:
在valkyrie的目录下有个INSTALL文件,里面介绍了如何编译安装valkyrie,由于作者本地的QT 环境很乱,没有成功也没有深究,就直接简单的sudo apt-get install valkyrie 了。大家有兴趣可以自己编译下valkyrie。而且valgrind好像也可以直接apt-get获取,作者没有实验。
valgrind的使用:
备注:
本部分参考
【 http://www.ibm.com/developerworks/cn/linux/l-cn-valgrind/ 】
【 http://valgrind.org/docs/manual/quick-start.html 】
建立一个简单的被测试文件:
【 sample.c 】
#include <stdlib.h>
void f(void)
{
    int* x = malloc(10 * sizeof(int));
    x[10] = 0;        // problem 1: heap block overrun
}                    // problem 2: memory leak -- x not freed
int main(void)
{
    f();
    return 0;
}
然后在命令行输入:
gcc -g -O0 sample.c -o sample
通过命令行来使用valgrind:
输入命令【 valgrind <Path>/sample 】,输出如下图所示:

具体的分析可以参考备注中的链接。
通过valkyrie来使用algrind:
打开valkyrie后,点击【 Edit – Options 】,点击【 Binary 】,选中要测试的可执行文件,点击【 OK 】,然后点击【 Process – Run 】。会产生分析,如下图:
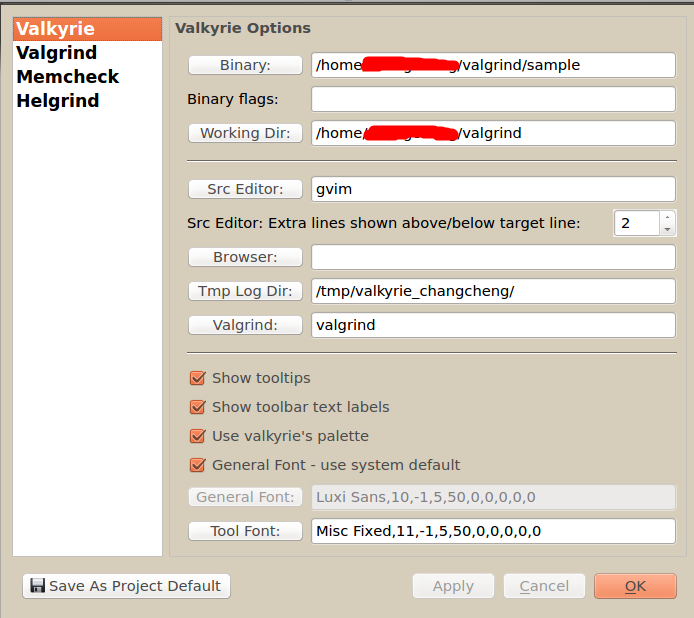
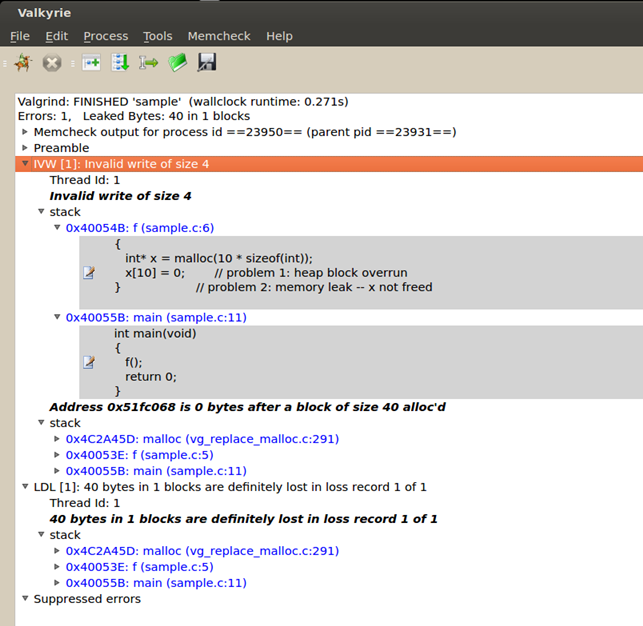
可以看到,使用valkyrie,可以看到源码,会更方便一点。
另外,如果使用valkyrie,点击【 Help – handbook 】,有比较详细的使用说明。
发表评论