以下内容转自【 http://blog.sina.com.cn/s/blog_59b4c31c0101iom0.html 】
CONTENTS
CCClippingNode 使用注意事项
最近使用了cocos2d-x 的CCClippingNode,在VC下编译可以出现效果,但是在IOS上毫无效果,发现网上也有人提出这个问题,先把方法记下来。
原帖地址:http://cocos2d-x.org/boards/6/topics/20141?r=20567#message-20567
for
iOS:
in AppController replace the gl-view creation with:
EAGLView *__glView = [EAGLView viewWithFrame: [window bounds] pixelFormat: kEAGLColorFormatRGBA8 depthFormat: GL_DEPTH24_STENCIL8_OES preserveBackbuffer: NO sharegroup: nil multiSampling: NO numberOfSamples: 0];
for
Android:
in
game activity:
public Cocos2dxGLSurfaceView onCreateView()
{
     Cocos2dxGLSurfaceView glSurfaceView = new Cocos2dxGLSurfaceView(this);
     glSurfaceView.setEGLConfigChooser(5, 6, 5, 0, 16, 8);
     return glSurfaceView;
}
CCClippingNode 例子
首先是两张图片:
background.png:来自cocos2dx的例子资源

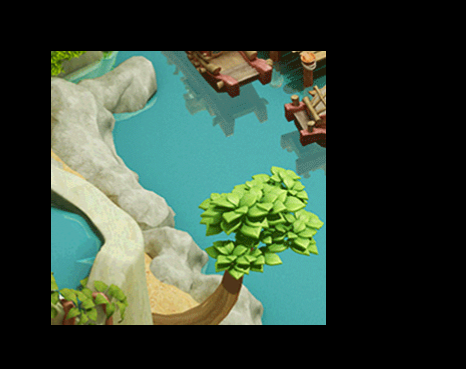
smallcircle.png:

可以看到,smallcircle.png 中间是透明的,最外侧是透明的,整个png是个正方形。
代码1:
	CCSprite *bg = CCSprite::create("background.png");
	CCSprite *stencilA = CCSprite::create("smallcircle.png");

	CCClippingNode *clipA = CCClippingNode::create();
	clipA->setStencil(stencilA);
	clipA->addChild(bg);

	clipA->setAnchorPoint(ccp(0,0));
	clipA->setPosition(ccp(300,300));
	this->addChild(clipA);
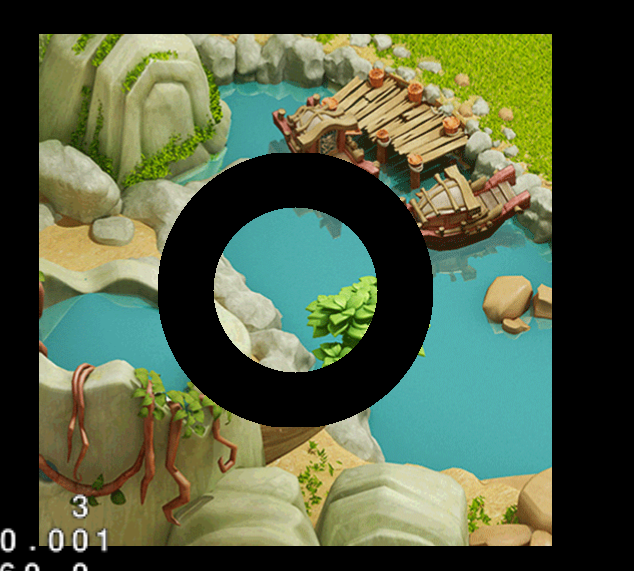
效果图:
加了透明度阈值判断的代码2:
	CCSprite *bg = CCSprite::create("background.png");
	CCSprite *stencilA = CCSprite::create("smallcircle.png");
	CCClippingNode *clipA = CCClippingNode::create();
	clipA->setStencil(stencilA);
	clipA->addChild(bg);

	clipA->setAlphaThreshold(GLfloat(0.5f));
	clipA->setAnchorPoint(ccp(0,0));
	clipA->setPosition(ccp(300,300));
	this->addChild(clipA);
效果图:

设置了反转的代码3:
	CCSprite *bg = CCSprite::create("background.png");
	CCSprite *stencilA = CCSprite::create("smallcircle.png");
	CCClippingNode *clipA = CCClippingNode::create();
	clipA->setStencil(stencilA);
	clipA->addChild(bg);

	clipA->setAlphaThreshold(GLfloat(0.5f));
	clipA->setInverted(true);
	clipA->setAnchorPoint(ccp(0,0));
	clipA->setPosition(ccp(300,300));
	this->addChild(clipA);
效果图:
CCClippingNode源码分析
后面用到了在仔细分析吧。
先贴个网址【 http://blog.csdn.net/crazyjumper/article/details/1968567 】
更新【2014年5月8日11:38:06】
CCClippingNode中的Stencil节点的位置
首先看下CCSprite的部分代码,通过这部分代码,我们可以知道,CCSprite在有texture的时候,默认锚点和默认位置分别为【0.5,0.5】和【0,0】:
const CCPoint CCPointZero = CCPointMake(0,0);
。。
class CC_DLL CCSprite : public CCNodeRGBA, public CCTextureProtocol
。。
class CC_DLL CCNodeRGBA : public CCNode, public CCRGBAProtocol
。。
CCNode::CCNode(void)
。。。。
, m_obPosition(CCPointZero)
, m_obAnchorPointInPoints(CCPointZero)
, m_obAnchorPoint(CCPointZero)
。。。。
// designated initializer
bool CCSprite::initWithTexture(CCTexture2D *pTexture, const CCRect& rect, bool rotated)
{
。。。
        // default transform anchor: center
        setAnchorPoint(ccp(0.5f, 0.5f));
。。。
}
那么stencil的绘制位置是如何确定的,看下CCClippingNode的部分代码:
void CCClippingNode::setStencil(CCNode *pStencil)
{
    CC_SAFE_RELEASE(m_pStencil);
    m_pStencil = pStencil;
    CC_SAFE_RETAIN(m_pStencil);
}
void CCClippingNode::visit()
{
。。。。。
。。。。。
    // draw the stencil node as if it was one of our child
    // (according to the stencil test func/op and alpha (or alpha shader) test)
    kmGLPushMatrix();
    transform();
    m_pStencil->visit();
    kmGLPopMatrix();
。。。。。
。。。。。
}
这里就很明显了,Stencil在绘制时是作为CCClippingNode的子节点绘制的。
我们这样看下最简单的代码:
CCSprite *background = CCSprite::create("background.jpg");
CCSprite *stencil = CCSprite::create("stencil.png");
CCClippingNode *clipA = CCClippingNode::create();
clipA->setStencil(stencil);
clipA->addChild(background);
//==>>background的锚点(0.5,0.5),位置(0,0)
//==>>stencil的锚点(0.5,0.5),位置(0,0)
这里可以知道background和stencil都是clipA的子节点,而且锚点和位置都相同,那么它们都会被绘制到clipA的中心位置。
发表评论