最近自学了下Django,这里笔记下学习记录。
CONTENTS
备注:
1 学习记录中的代码和资料参考自网络教程【 http://djangobook.py3k.cn/2.0/ 】和【 http://www.djangobook.com/en/2.0/ 】,版权归原作者所有。
2 小弟第一次接触到Django,本笔记可能有错误,还请各位路过的大牛们给予指点。
3 由于教程年代比较久远了,而且Django不同版本改动很大,这里作者的学习笔记是基于【 python2.7.8 + django1.6.5 】实现的。
4 由于时间关系,学习记录里有的地方记得比较乱,以后有时间再整理下吧。
数据库配置:
为了简单起见,这里使用默认的Sqlite来作为数据库,那么默认建立的工程已经配置好了数据库~~
这里首先看下 settings.py 中关于数据库的配置:
DATABASES = {
    'default': {
        'ENGINE': 'django.db.backends.sqlite3',
        'NAME': os.path.join(BASE_DIR, 'db.sqlite3'),
    }
}
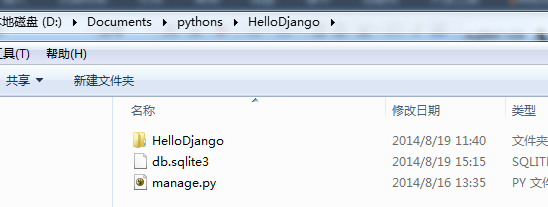
这里可以知道数据库的地址为 D:\Documents\pythons\HelloDjango\db.sqlite3,在settings.py上一级,和manage.py同一级。如下图:
测试数据库是否正确配置,启动命令行:
D:\Documents\pythons\HelloDjango>python manage.py shell
。。。。。。
>>> from django.db import connection
>>> cursor = connection.cursor()
>>>
如果没有错误,就说明配置正确。
新建一个APP:
启动CMD,输入命令:
D:\Documents\pythons\HelloDjango>python manage.py startapp books
D:\Documents\pythons\HelloDjango>
成功之后新建了一个APP,名字为books。文件夹存放如下图:

然后我们把这个APP注册到工程里面,打开HelloDjango下的settings.py,文件路径:【 D:\Documents\pythons\HelloDjango\HelloDjango\settings.py 】,将books加入INSTALLED_APPS中,最后如下:
INSTALLED_APPS = (
    'books',
    'HelloDjango',
    'django.contrib.admin',
    'django.contrib.auth',
    'django.contrib.contenttypes',
    'django.contrib.sessions',
    'django.contrib.messages',
    'django.contrib.staticfiles',
)
增加存储结构:
打开books文件夹下面的models.py,路径:【 D:\Documents\pythons\HelloDjango\books\models.py 】,输入内容如下:
from django.db import models

# Create your models here.
class Publisher(models.Model):
	name = models.CharField(max_length=30);
	address = models.CharField(max_length=50);
	city = models.CharField(max_length=60);
	state_province = models.CharField(max_length=30);
	country = models.CharField(max_length=50);
	website = models.URLField();

class Author(models.Model):
	first_name = models.CharField(max_length=30);
	last_name = models.CharField(max_length=40);
	email = models.EmailField();

class Book(models.Model):
	title = models.CharField(max_length=100);
	authors = models.ManyToManyField(Author);
	publisher = models.ForeignKey(Publisher);
	publication_date = models.DateField();
这里的需要注意的是Book类的authors和publisher的定义。
输入完毕之后,我们验证一下是否输入有效:
D:\Documents\pythons\HelloDjango>python manage.py validate
0 errors found
没有错误,就开始生成SQL命令:
D:\Documents\pythons\HelloDjango>python manage.py sqlall books
BEGIN;
CREATE TABLE "books_publisher" (
    "id" integer NOT NULL PRIMARY KEY,
    "name" varchar(30) NOT NULL,
    "address" varchar(50) NOT NULL,
    "city" varchar(60) NOT NULL,
    "state_province" varchar(30) NOT NULL,
    "country" varchar(50) NOT NULL,
    "website" varchar(200) NOT NULL
)
;
CREATE TABLE "books_author" (
    "id" integer NOT NULL PRIMARY KEY,
    "first_name" varchar(30) NOT NULL,
    "last_name" varchar(40) NOT NULL,
    "email" varchar(75) NOT NULL
)
;
CREATE TABLE "books_book_authors" (
    "id" integer NOT NULL PRIMARY KEY,
    "book_id" integer NOT NULL,
    "author_id" integer NOT NULL REFERENCES "books_author" ("id"),
    UNIQUE ("book_id", "author_id")
)
;
CREATE TABLE "books_book" (
    "id" integer NOT NULL PRIMARY KEY,
    "title" varchar(100) NOT NULL,
    "publisher_id" integer NOT NULL REFERENCES "books_publisher" ("id"),
    "publication_date" date NOT NULL
)
;
CREATE INDEX "books_book_authors_36c249d7" ON "books_book_authors" ("book_id");
CREATE INDEX "books_book_authors_e969df21" ON "books_book_authors" ("author_id");
CREATE INDEX "books_book_81b79144" ON "books_book" ("publisher_id");

COMMIT;

D:\Documents\pythons\HelloDjango>
这里我们也没有显式的定义主键,django会自动生成一个自增长的整数主键,名字为id。
由于book和author是多对多的关系,django额外自动生成了一个对应关系表books_book_authors。不过这里感觉有点问题,books_book_authors的book_id应该也有外键关联才对,但是这里SQL没有体现出来。
这里打印出SQL并没有真正的执行,执行SQL需要继续输入命令:
D:\Documents\pythons\HelloDjango>python manage.py syncdb
Creating tables ...
Creating table books_publisher
Creating table books_author
Creating table books_book_authors
Creating table books_book
Creating table django_admin_log
Creating table auth_permission
Creating table auth_group_permissions
Creating table auth_group
Creating table auth_user_groups
Creating table auth_user_user_permissions
Creating table auth_user
Creating table django_content_type
Creating table django_session

You just installed Django's auth system, which means you don't have any superusers defined.
Would you like to create one now? (yes/no):
由于我们的工程默认启动了admin模块,因此在第一次数据库写入时会提醒我们是否把管理员权限启动,这里我们选择yes。输入用户名,邮箱和密码。后续会提及它的使用。这里先把网址放出来:http://127.0.0.1:8000/admin/。
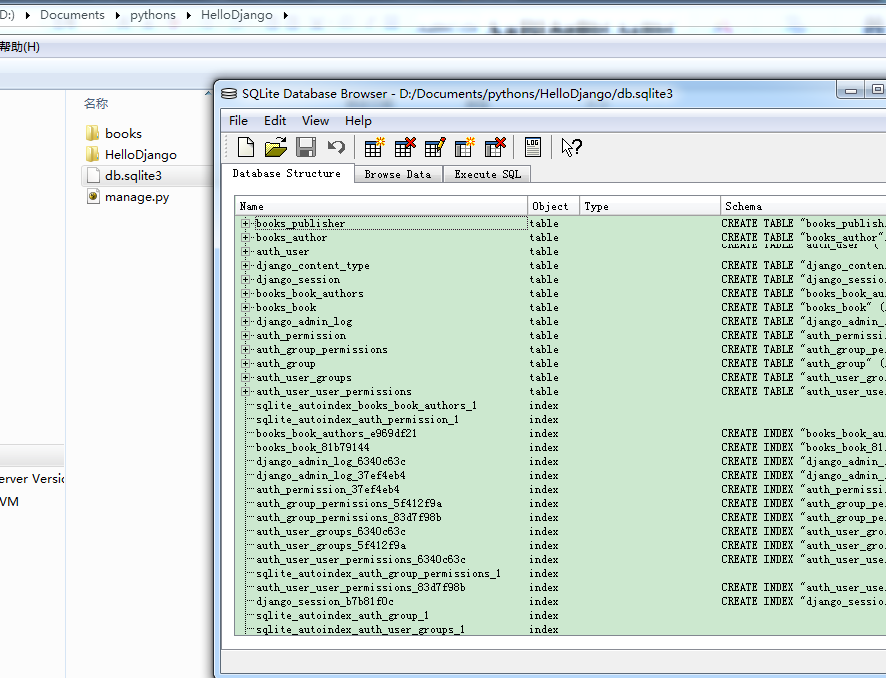
SQL执行完毕之后,数据库表就建好了,这里我们用软件打开看一下:
数据库操作:
简单的插入和查询:
打开CMD,输入命令:
D:\Documents\pythons\HelloDjango>python manage.py shell
>>> from books.models import *
>>> p1 = Publisher(name="Apress",address='2855 Txx Axx',city='Berkeley',state_province='CA',country='USA',website='http://www.apress.com/');
>>> p1.save();
>>> p2 = Publisher(name="O'Reilly",address='10 Fxx Sxx',city='Cambridge',state_province='MA',country='USA',website='http://www.oreilly.com/');
>>> p2.save();
>>> publisher_list = Publisher.objects.all();
>>> publisher_list
[<Publisher: Publisher object>, <Publisher: Publisher object>]
>>>
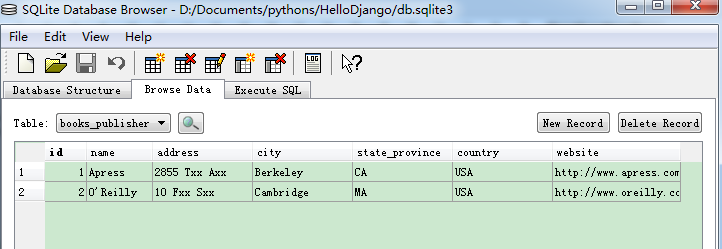
这里调用save方法会写入数据库。用工具看一下,已经插入了:
这里查询数据时可以看到读取的数据打印到控制台上不好阅读,这里我们通过增加__unicode__方法来修复,注意如果这里是python3.x版本,__unicode__已经被废弃,方法名称应该为__str__。
修改后的models.py:
class Publisher(models.Model):
。。。。。。
	def __unicode__( self ):
		return u'Name:%s WebSite:%s' % (self.name, self.website);

class Author(models.Model):
	。。。。。。
	def __unicode__( self ):
		return u'first:%s last:%s' % (self.first_name, self.last_name);

class Book(models.Model):
	。。。。。。
	def __unicode__( self ):
		return u'title:%s' % (self.title);
修改好之后,如果要看效果,需要重启下shell:
>>> exit()

D:\Documents\pythons\HelloDjango>python manage.py shell
>>> from books.models import *
>>> publisher_list = Publisher.objects.all();
>>> publisher_list
[<Publisher: Name:Apress WebSite:http://www.apress.com/>, <Publisher: Name:O'Reilly WebSite:http://www.oreilly.com/>] >>>
条件查找:
参考网址:https://docs.djangoproject.com/en/1.6/topics/db/queries/
这里只笔记几个简单的:
精确查找:
>>> Publisher.objects.filter(name='Apress')
[<Publisher: Name:Apress WebSite:http://www.apress.com/>]
>>> Publisher.objects.filter(country="U.S.A.", state_province="CA")
[]
模糊查找:
在 name 和 contains 之间有双下划线。这里,contains部分会被Django翻译成LIKE语句:
>>> Publisher.objects.filter(name__contains="press")
[<Publisher: Name:Apress WebSite:http://www.apress.com/>]
>>>
定位到单个对象,注意这里如果返回数目多于1个或者没有返回均会报错:
>>> Publisher.objects.get(name='Apress')
<Publisher: Name:Apress WebSite:http://www.apress.com/>
排序与逆向排序:
>>> Publisher.objects.order_by("name")
[<Publisher: Name:Apress WebSite:http://www.apress.com/>, <Publisher: Name:O'Reilly WebSite:http://www.oreilly.com/>]
>>> Publisher.objects.order_by("-name")
[<Publisher: Name:O'Reilly WebSite:http://www.oreilly.com/>, <Publisher: Name:Apress WebSite:http://www.apress.com/>]
复合查询:
>>> Publisher.objects.filter(country="USA").order_by("-name")[0]
<Publisher: Name:O'Reilly WebSite:http://www.oreilly.com/>
更新:
>>> Publisher.objects.filter(country='USA').update(country='U.S.A.')
2
删除:
>>> Publisher.objects.filter(country='USA').delete()
>>> Publisher.objects.all().delete()
>>>
备注:
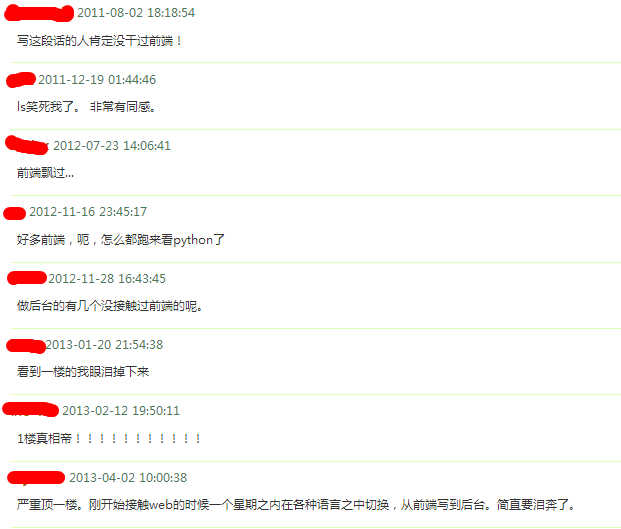
各种有意思的评注:


发表评论